COM port over EtherCAT in RTX64
COM port over EtherCAT is a virtual COM port an application can use on an EtherCAT device as if it is on the computer. Some EtherCAT slaves have COM ports, which can be connected to other COM port devices. Through COM port over EtherCAT, the application can control these devices using the KINGSTAR COM port API. RTX64 and KINGSTAR applications are supported to use this feature. The KINGSTAR COM port API match the Windows COM API.
To use COM port over EtherCAT, you need an EtherCAT coupler that has both EtherCAT and COM ports. The coupler connects to the computer through EtherCAT and connects to a COM port device through the COM port.
The applications we use to showcase COM port over EtherCAT are ModSim, KINGSTAR Demo and the KINGSTAR COM port sample. ModSim is WinTECH's program to communicate with the COM-port device. KINGSTAR Demo is used to control the EtherCAT connection. The reason we use KINGSTAR Demo is the KINGSTAR COM port sample doesn't provide the capability of an EtherCAT connection; it only handles the COM port communication. Its purpose to do this is to make the COM port an independent interface that can be used by any application without the KINGSTAR API. The benefit of doing this is that any application can access the COM port once the EtherCAT link is up. When you use the COM port, you can create two applications like this: one for EtherCAT connection and one for the COM port control. You can also merge the capabilities of the EtherCAT connection and the COM port control into one application, depending on what you need.
NOTE: ModSim is a trademark of WinTECH Software Design. The official website is https://www.win-tech.com/.
Run the KINGSTAR COM port sample
In this example, the KINGSTAR COM port sample is connected to the COM6 port of the COM-port device. It reads a value from ModSim and increases it by one.
To run the sample:
- Connect your EtherCAT coupler to your COM-port device. In our example, we use Beckhoff EK1100 as the EtherCAT coupler and Beckhoff EL-6021 as the COM-port device.
- Connect your EtherCAT coupler to your KINGSTAR Fieldbus network.
- Connect your COM-port device to your computer.
- On the taskbar, click Start
 > KINGSTAR Runtime > KINGSTAR Configuration Tool.
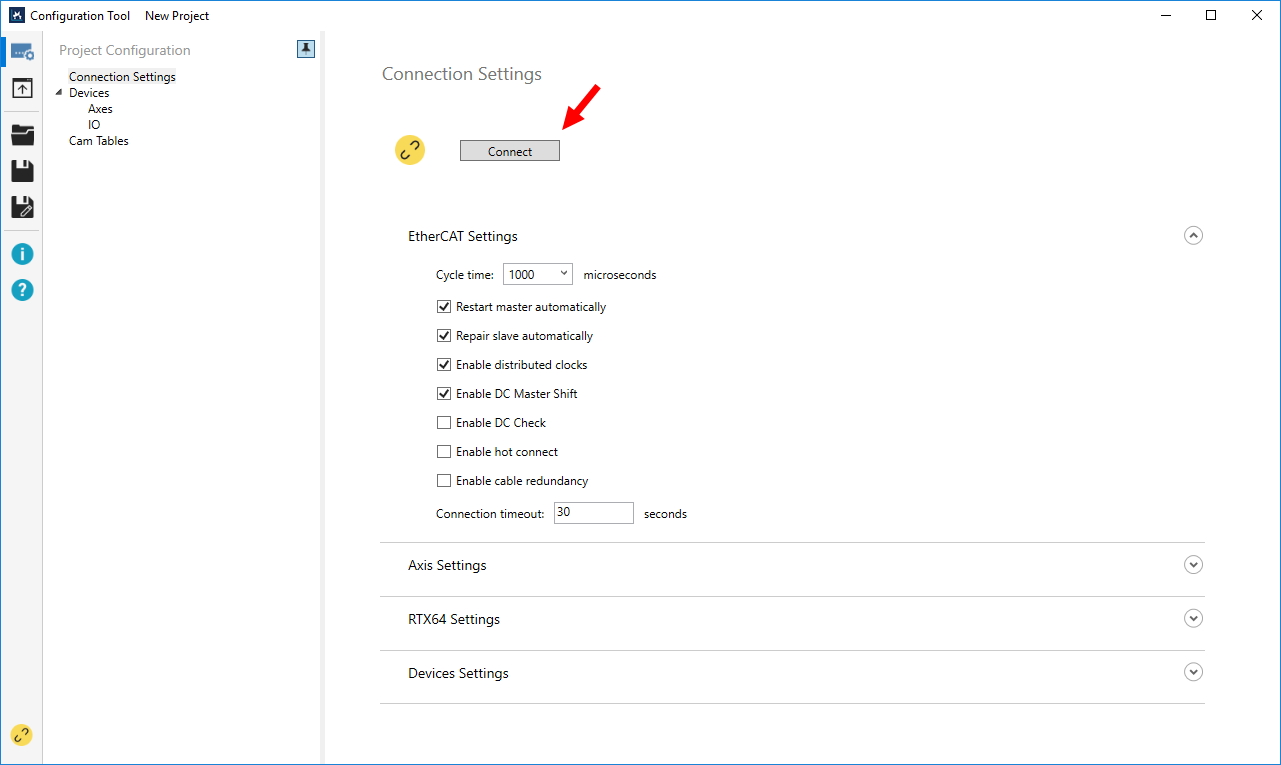
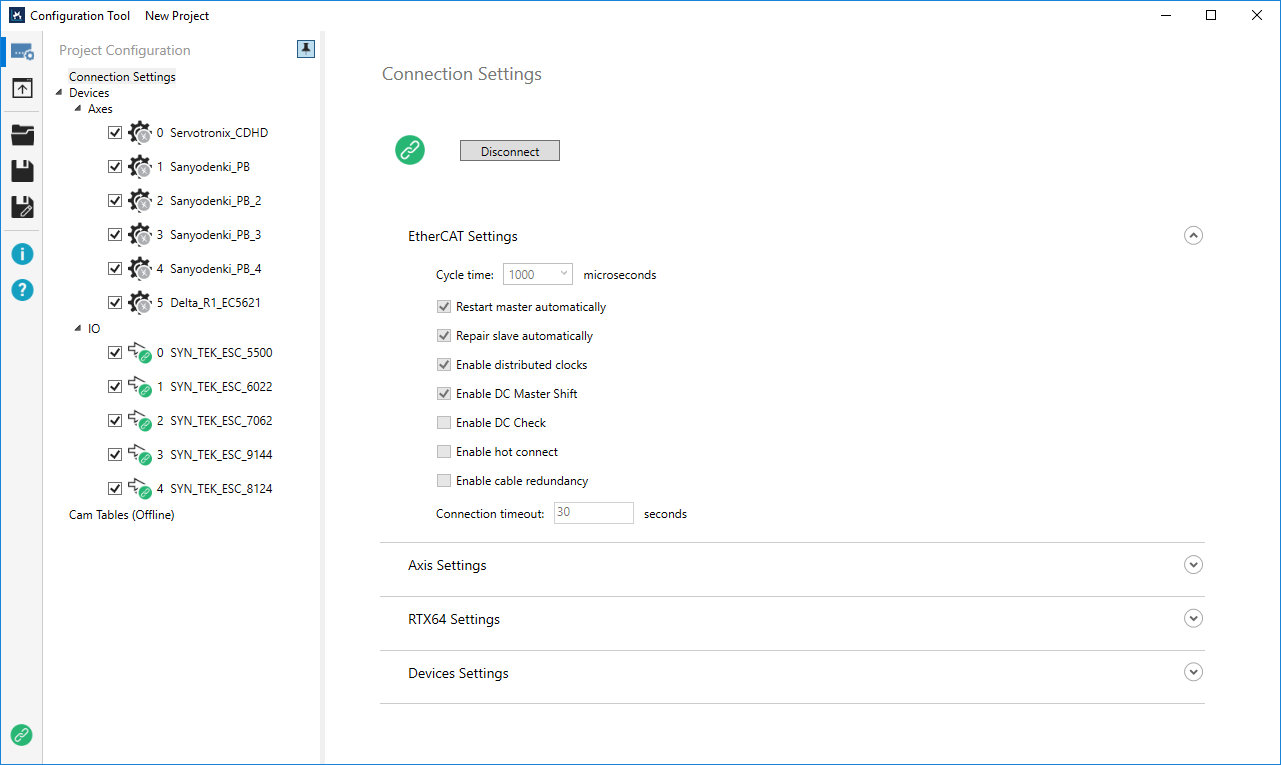
 - After KINGSTAR Configuration Tool is started, click Connect. If the connection is successful, the hardware will be displayed in Project Configuration.
- After the EtherCAT connection is established, open the Visual Studio project file of the COM port sample, which is located at
C:\Users\Public\Public Documents\IntervalZero\KINGSTAR SDK\<Version Number>\Samples\ComSample\ComSample.sln. - In Visual Studio, in Solution Explorer, double-click
ComSample.cppandModbus.cppto open them. - Start ModSim.
- In ModSim, on the File menu, click New.
- On the Connection menu, click Connect > Port 6.
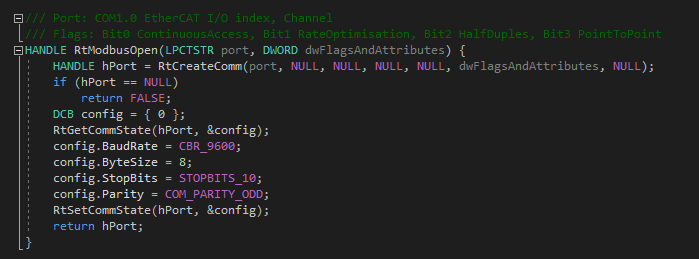
- In the Setup Comm Port 6 dialog box, make sure the settings are the same as the HANDLE RtModbusOpen block in
Modbus.cpp. - In the Setup Comm Port 6 dialog box, in the Hardware Flow Control area, change the value of Delay ms after RTS before transmitting first character and Delay ms after last character before releasing RTS to 100, and click OK.
- In Visual Studio, in the toolbar, click IntervalZero Real-time Debugger, or press F5 to run the sample.
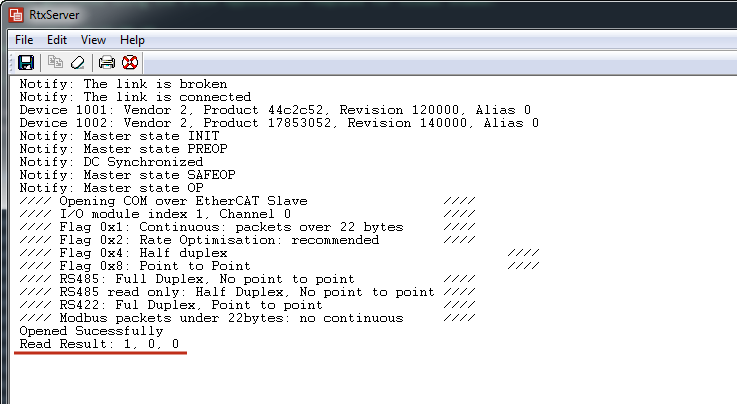
- After the sample runs, display the RtxServer window and check the Read Result line. There are three values from left to right: read result, error code, and value.
- Read result: check whether the value is read successfully. Success: 1. Failure: 0.
- Error code: it uses the Windows function GetLastError to return the Windows error code. The error code list can be checked on the System Error Codes web page on the Microsoft site.
- Value: the value read from ModSim. In our example, the value is zero. After you read it, the COM port sample will increase the read value by one. The next time the value read will be one.
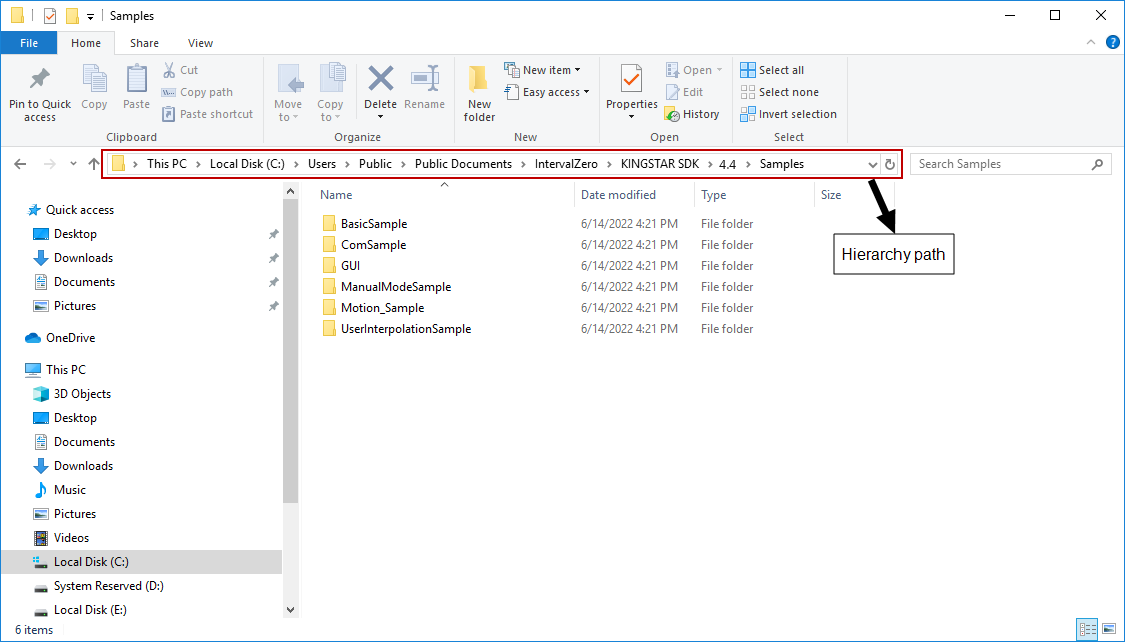
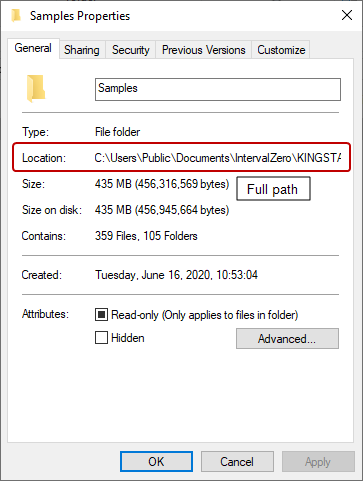
NOTE: File Explorer has two paths: the hierarchy and full path. The hierarchy path is shown in the address bar. The full path is shown in <File Name> Properties—if you right-click ComSample.sln and click Properties, you'll see the Location is C:\Users\Public\Documents\IntervalZero\KINGSTAR SDK\<Version Number>\Samples\ComSample\, which is the full path. Notice that the hierarchy path is Public Documents. If you are using a non-English Windows system, and you want to copy and paste the path to the address bar to find the sample quickly, you must use the full path. If you want to browse to the sample folder through clicks, use the hierarchy path. For English Windows, folder redirection is done automatically, so even if you paste the hierarchy path, File Explorer can lead you to the sample.
|
|

Baud Rate: 9600
Data Bits: 8
Stop Bits: 1
Parity: ODD

COM port API functions
KINGSTAR COM port functions work the same way as RTX64 functions and Microsoft communication functions. The following table shows the corresponding functions.
| KINGSTAR COM port functions | Corresponding functions | Link source |
|---|---|---|
| KsCreateComm | CreateFile | RTX64 |
| KsCloseComm | CloseHandle | RTX64 |
| KsReadFile | ReadFile | RTX64 |
| KsWriteFile | WriteFile | RTX64 |
| KsBuildCommDCB | BuildCommDCBA | Microsoft |
| KsClearCommBreak | ClearCommBreak | Microsoft |
| KsClearCommError | ClearCommError | Microsoft |
| KsEscapeCommFunction | EscapeCommFunction | Microsoft |
| KsGetCommMask | GetCommMask | Microsoft |
| KsGetCommModemStatus | GetCommModemStatus | Microsoft |
| KsGetCommProperties | GetCommProperties | Microsoft |
| KsGetCommState | GetCommState | Microsoft |
| KsGetCommTimeouts | GetCommTimeouts | Microsoft |
| KsPurgeComm | PurgeComm | Microsoft |
| KsSetCommBreak | SetCommBreak | Microsoft |
| KsSetCommMask | SetCommMask | Microsoft |
| KsSetCommState | SetCommState | Microsoft |
| KsSetCommTimeouts | SetCommTimeouts | Microsoft |
| KsSetupComm | SetupComm | Microsoft |
| KsTransmitCommChar | TransmitCommChar | Microsoft |
| KsWaitCommEvent | WaitCommEvent | Microsoft |
| KsGetOverlappedResult | GetOverlappedResult | Microsoft |