This section provides the information about the user interface of KINGSTAR Scope.
When launching the KINGSTAR Scope through the KINGSTAR Control Panel, a "Connect to KINGSTAR Runtime" dialog box appears.
- Connect to local Runtime: This option is only available on the computer with KINGSTAR Runtime installed. Select to connect the Scope to the local KINGSTAR Runtime. You can select an instance ID by inputting an ID in the Instance input box.
- Connect to remote Runtime: Select to connect the Scope to the remote KINGSTAR Runtime. Fill in the username of that remote computer, select the user role and fill in the password. You can select an instance ID by inputting an ID in the Instance input box.
Note that an OPC UA server connection information is needed for remote connection. Please see OPC UA Server for details about how to configure the server; and see KINGSTAR OPC UA for understanding more about KINGSTAR OPCUA.
NOTE: The Instance input box only appears if you have created instances on the General Settings page of KINGSTAR Control Panel. You can input an instance ID to launch the Configuration Tool. The selected instance ID will be displayed on the title bar of the Scope.
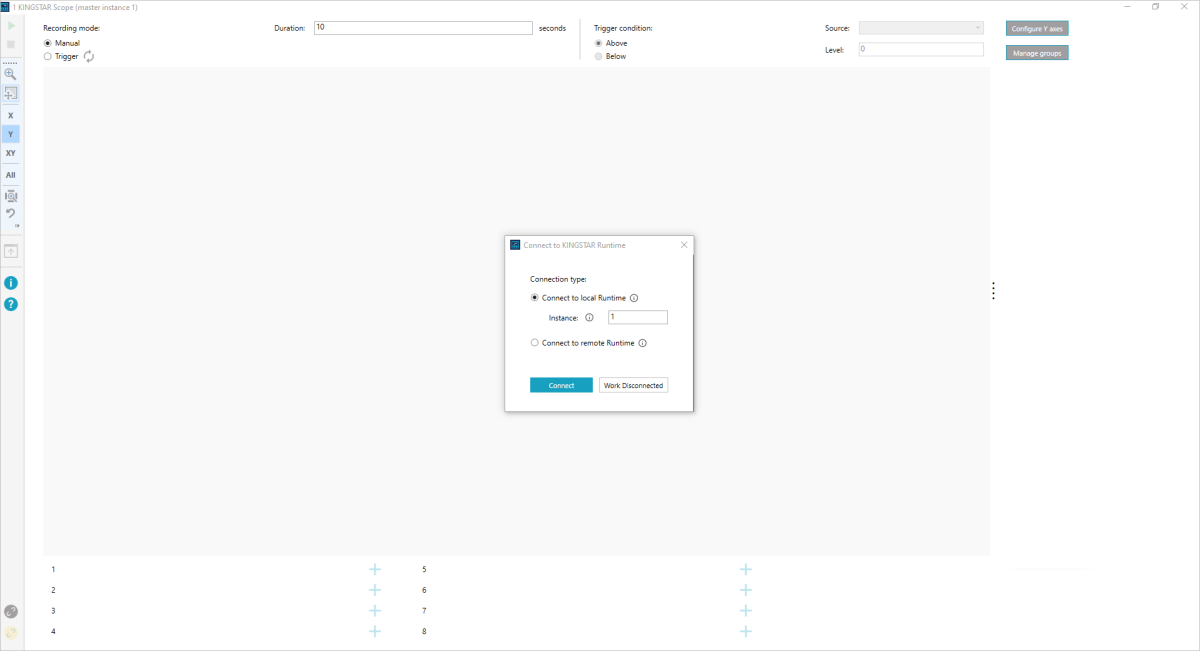
Click Connect, the Scope has been connected to the selected KINGSTAR Runtime. You can start using the Scope. Below are the descriptions of the user interface:
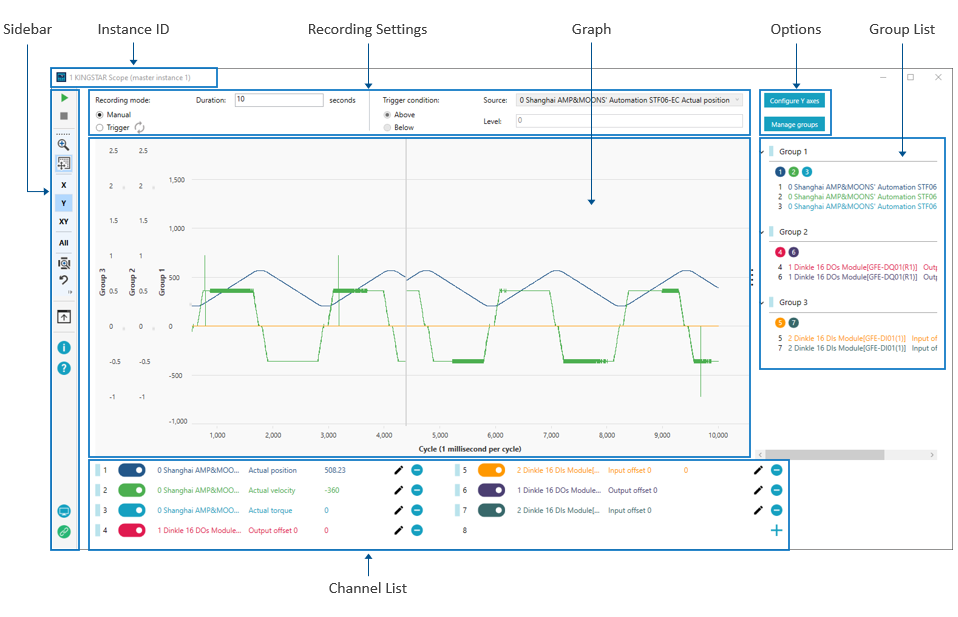
[Sidebar]: the commands that control Scope.
[Instance ID]: displays the selected instance ID. Note that if instance 0 is selected, the title bar will not show the ID.
[Recording settings]: configures the recording settings.
[Graph]: displays the traces of recorded variables.
- Cycle: cycles are set by the KINGSTAR application you use to create the EtherCAT connection. By default, a cycle is 1 millisecond.
[Options]: changes Y axes and manages groups.
- Configure Y axes: changes the order of the Y axes of channels or groups. The black icon represents the graph. If the Y-axis is on the left side of the icon, it is displayed on the graph's left; if it is on the right side of the icon, it is displayed on the graph's right.
- Manage groups: adds or removes channels from groups. To add or remove a channel, drag it from Ungrouped channels to a Group. You can also drag the channel between the groups. To ungroup all channels, click Remove all. The groups are present in Group list.
[Group list]: displays the grouped channels.
[Channel list]: displays the connected hardware.