You may want to check different variables of the same device, or compare the same variable of different devices. To check or compare them, add the channels to a group.
Add channels to a group
There are two ways to add channels to a group.
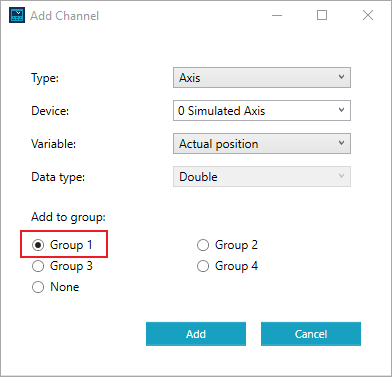
From Add Channel:
- Add a device to a channel. In the Add Channel dialog box, under Add to group, select a group you want to use. In this guide, we select Group 1.
- Repeat step 1 to add other devices to other channels, and select Group 1.
- The channels are added to a group. Check them in Group list.
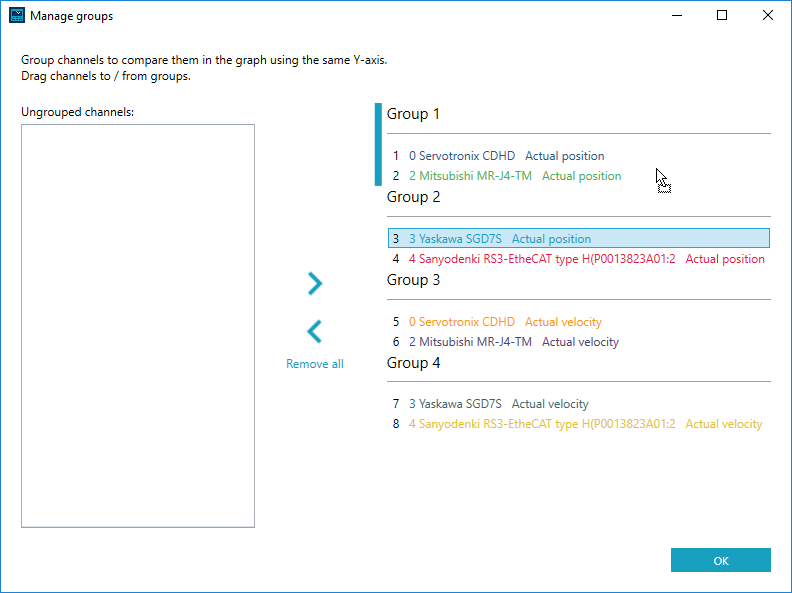
From Manage groups:
- Click Manage groups.
- In the Manage groups dialog box, in the Ungrouped channels list, drag the channels to a group.
- You can move a channel to a different group by dragging it between groups. After you group the channels, click OK.
- The channels are added to groups. Check them in Group list.

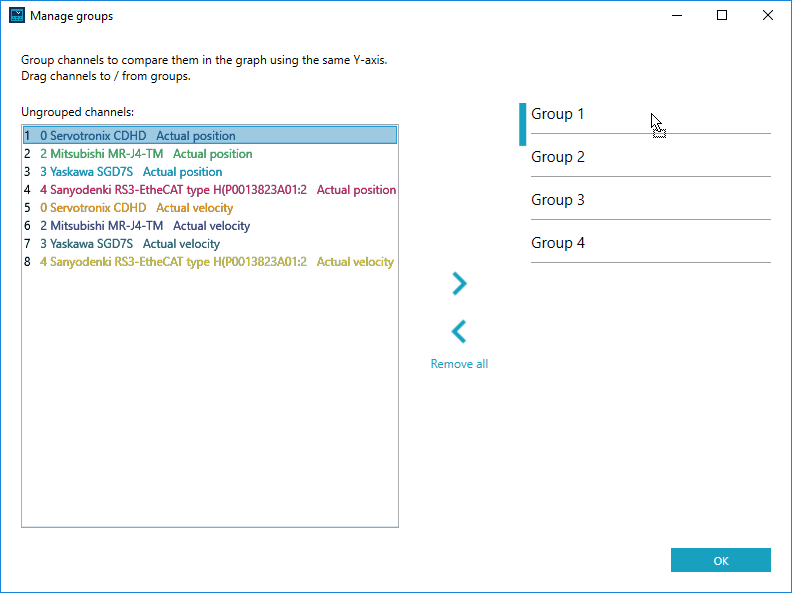
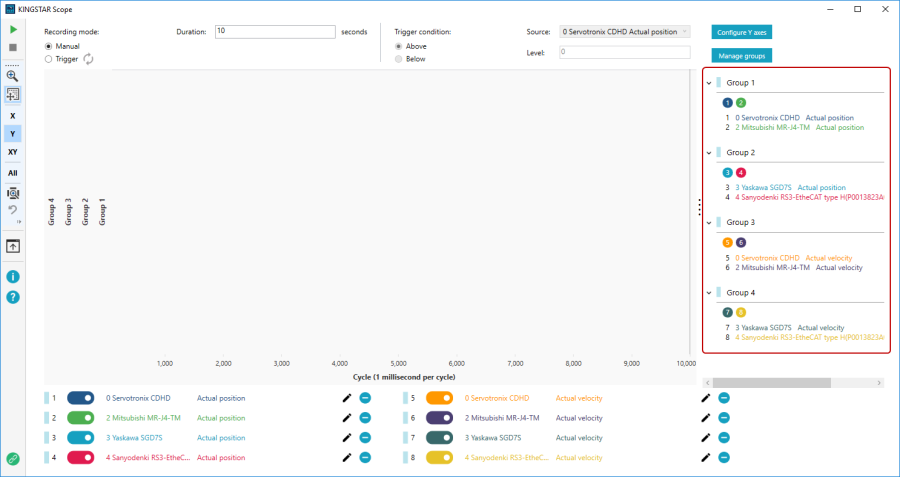
NOTE: We suggest you add channels first, and then add them to groups using Manage groups. It's more convenient to add channels to groups using Manage groups.
NOTE: To ungroup the channels, in the Manage groups dialog box, drag them back to the Ungrouped channels list.
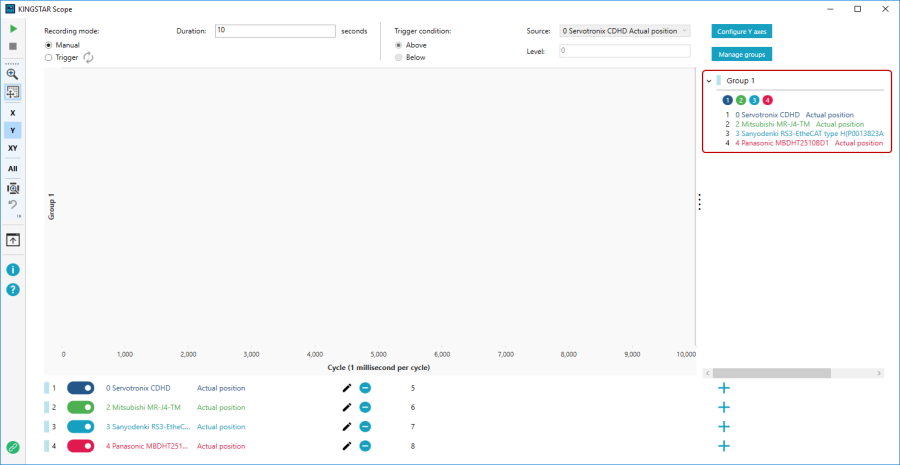
Compare the result
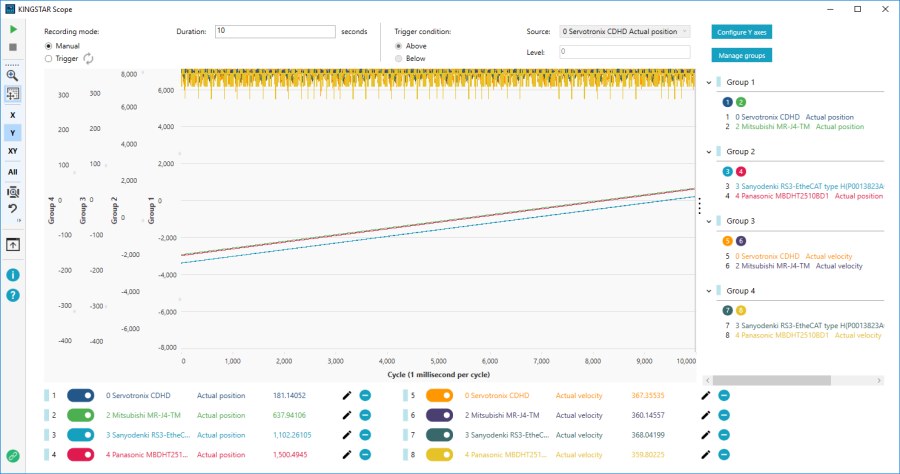
- After the recording is completed, in the Sidebar, click Zoom to fit
 to display all traces in the graph. For more information about how to record, see Record the variables.
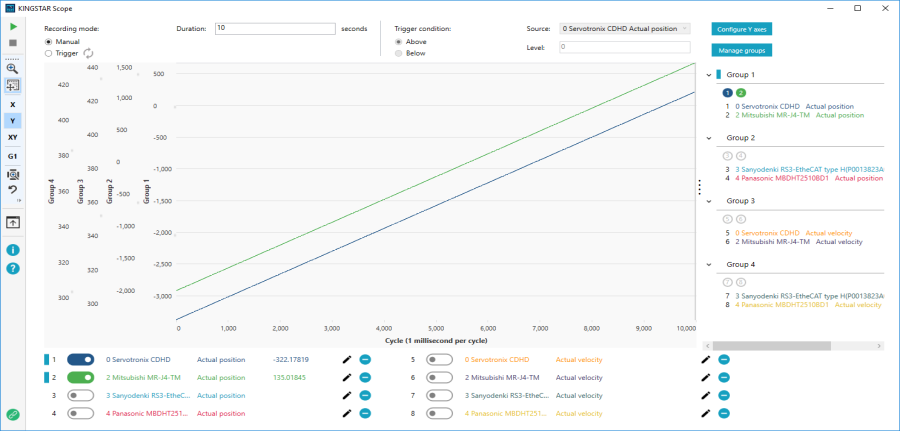
 - In Channel list, click a grouped channel. We want to compare the channels in Group 1, so we click a channel in Group 1.
- The Status bar of Group 1 lights up. Zoom target becomes G1. Turn off other channels, so it's easier to compare G1's results. The Y-axis of Group 1 is zoomed when you scroll the mouse wheel.

NOTE: If you press X or XY in the Sidebar, the X-axis or both XY axes will be zoomed.
See also