Modbus RTU slave
To use Modbus RTU slave, we need to decide which COM port receives data, and connect this COM port to an RTU slave.
NOTE: Before you use RTU slave, make sure you have already assigned a COM port to RTX64. For further details about how to assign a COM port, see Modbus RTU.
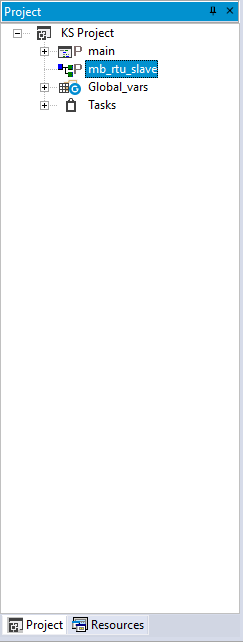
- In the Project pane, add a new program with FBD. You can decide its name and task, or use the settings we provided.
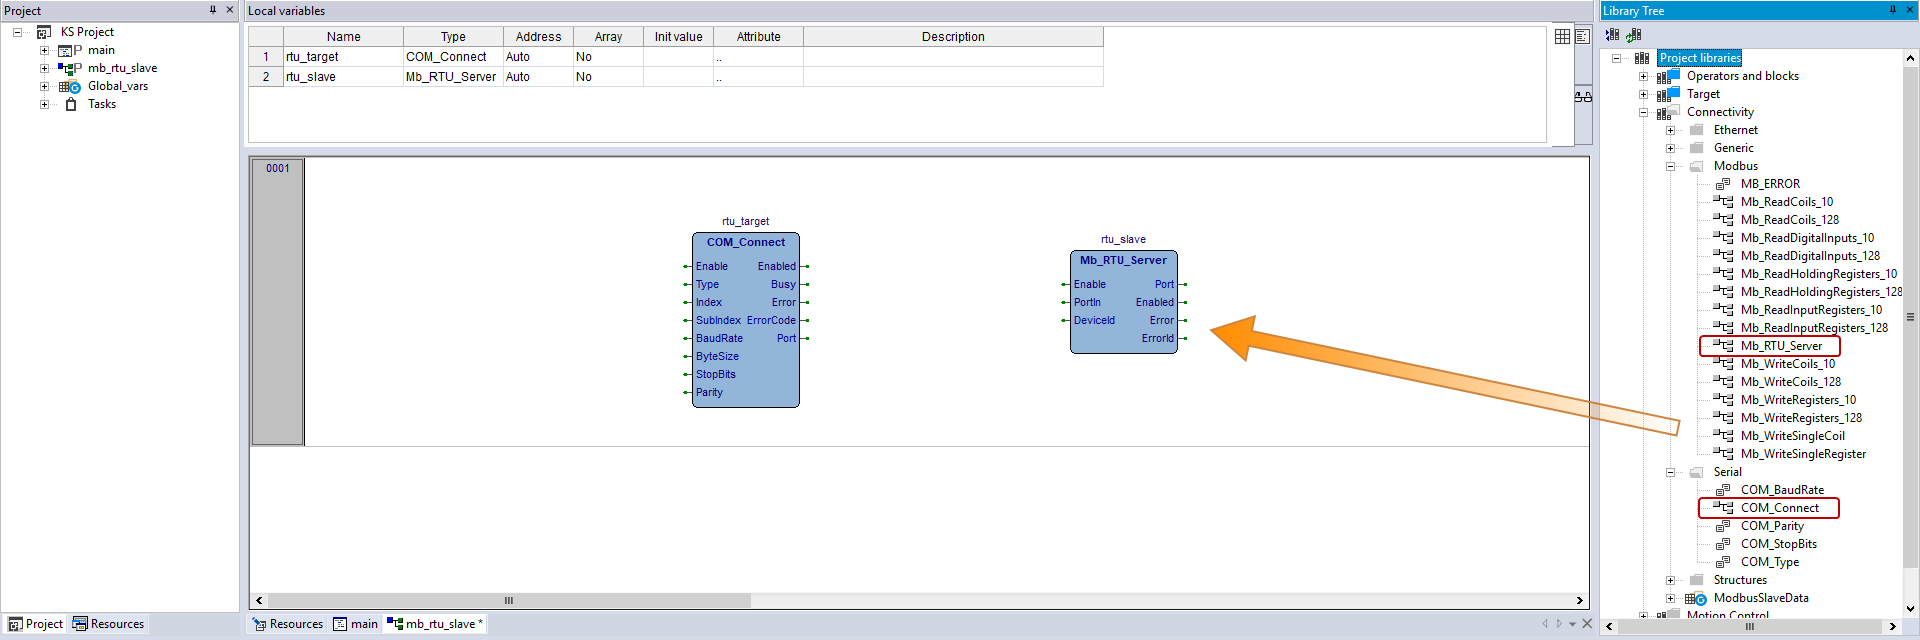
- In Library Tree, drag the following function blocks (FBs) to the source editor and give them meaningful names. COM_Connect is the COM port that the RTU slave uses to receive data. Mb_RTU_Server is an RTU slave. After you add the FBs to the source editor, they will also be added to local variables.
- Connectivity > Serial > COM_Connect
- Connectivity > Modbus > Mb_RTU_Server
- Add the following variables, which control the Enable state of COM_Connect and Mb_RTU_Server.
- Add the following inputs and outputs to the FBs as the screen shot shows.
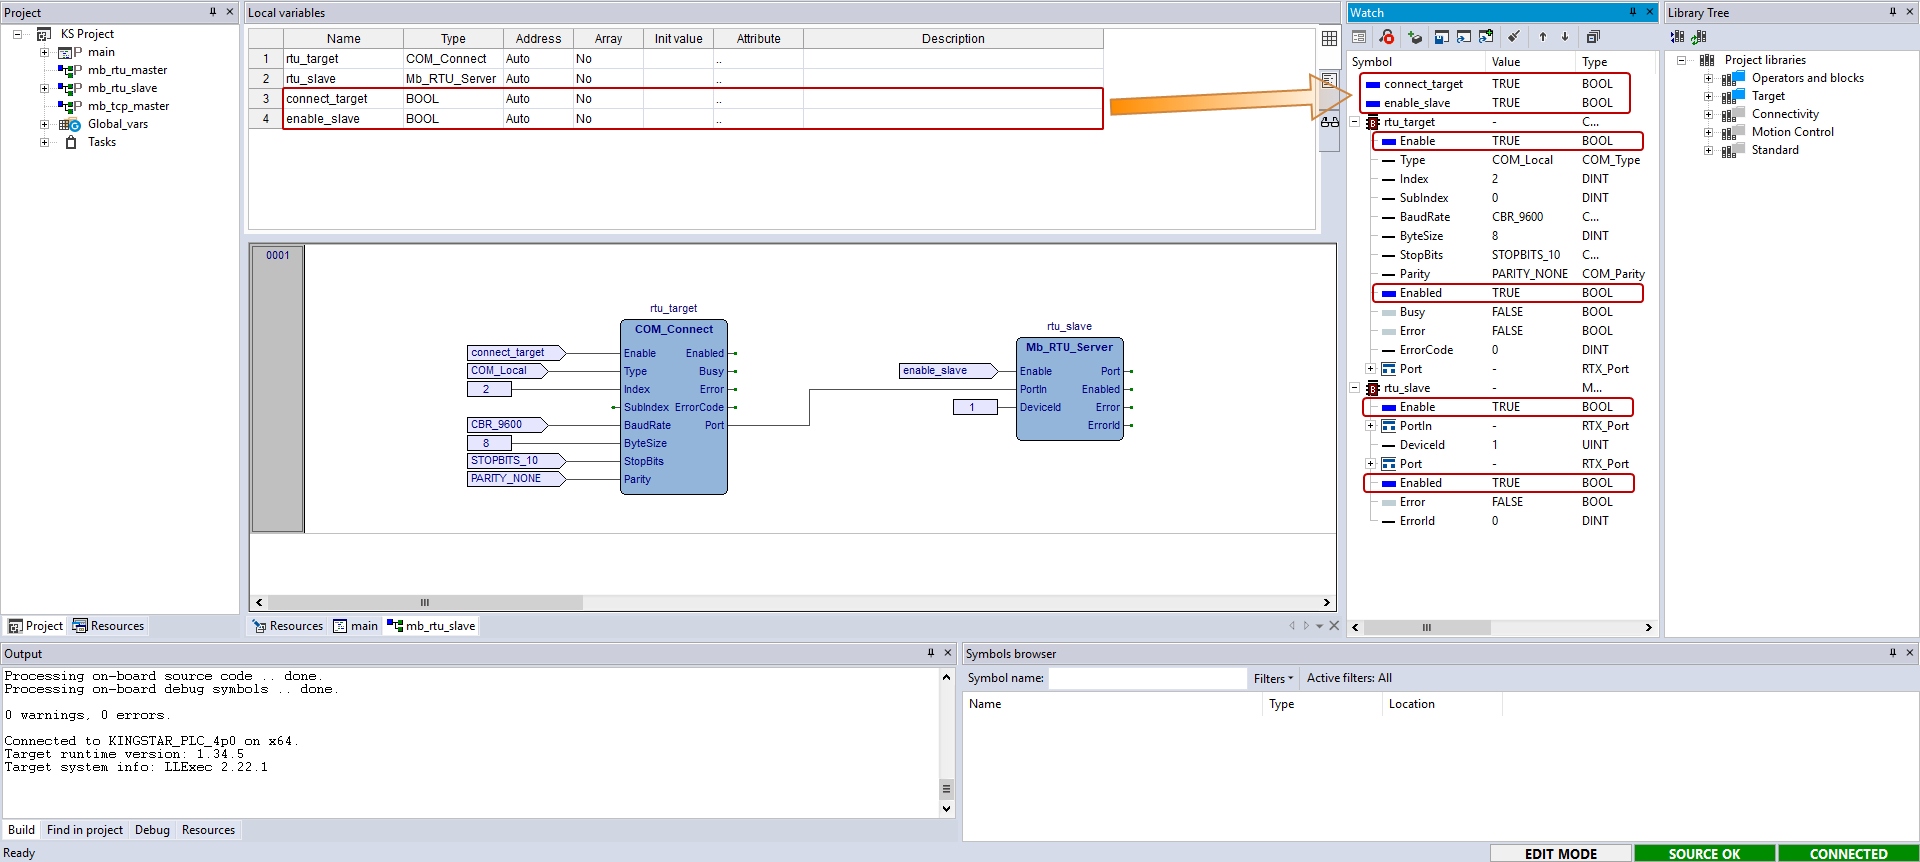
- Compile and run the PLC program. To toggle the BOOL variables, drag them to the Watch panel and set their values. Remember, you need to use
connect_targetandenable_slaveto turn on the Enable state of the FBs so they can start working. To check the Enable state, add the two FBs to the Watch panel, expand rtu_target and rtu_slave and check their states. If the following states are TRUE, it means they are enabled. - rtu_target
- Enable
- Enabled
- rtu_slave
- Enable
- Enabled
Language: FBD
Name: mb_rtu_slave
Task: Fast
NOTE: For more information about how to add a new program, see PLC programming.
|
|
Variable 1 | Variable 2 |
|---|---|---|
|
Attributes |
Name: connect_target Type: BOOL Address: Auto |
Name: enable_slave Type: BOOL Address: Auto |
| Usage | Enable or disable COM_Connect. | Enable or disable Mb_RTU_Server. |

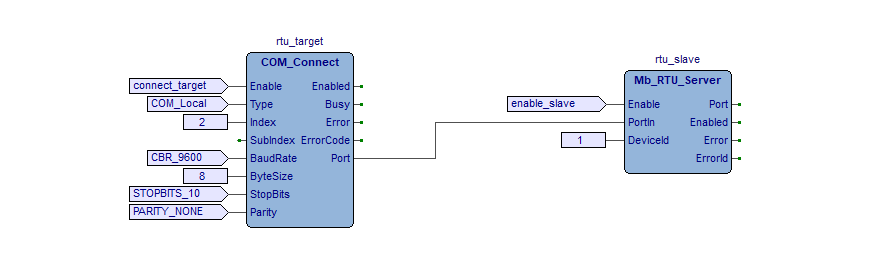
If you want to use the RTU master and slave examples in this guide to test Modbus data transmission, for Modbus RTU slave, make sure Index in the slave's COM_Connect is different from that in the master's, and make sure the DeviceId in the Modbus master's command (e.g. Mb_ReadCoils_10) and Modbus slave's Mb_RTU_Server are the same.
NOTE: For more information about compiling and running, see Compile and run your PLC program.
NOTE: For more information about toggling a boolean, see Step 8 in Start and stop the KINGSTAR Subsystem through variables.