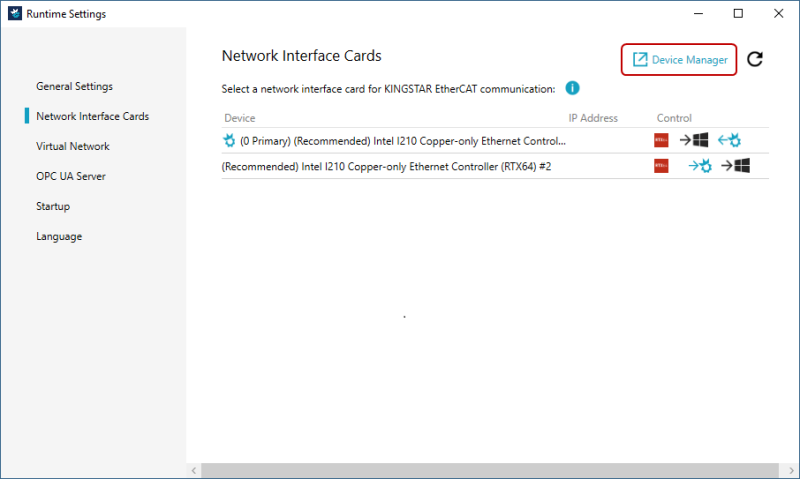
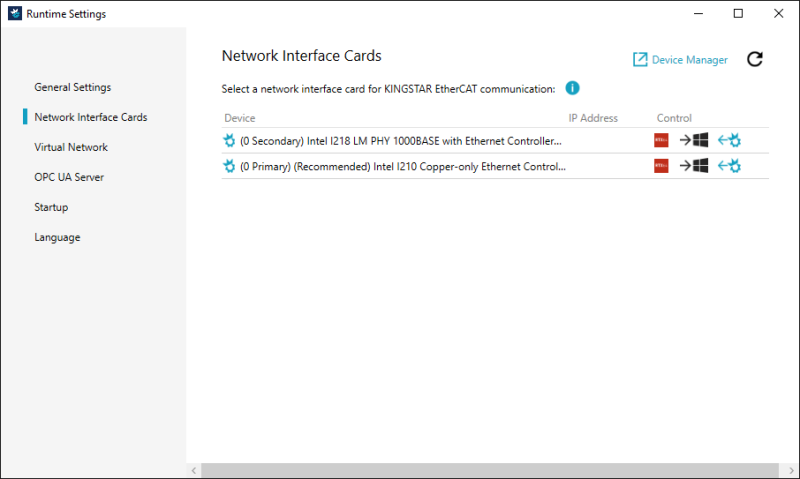
On this page, you can assign a network interface card to KINGSTAR or return it to Windows with one click.
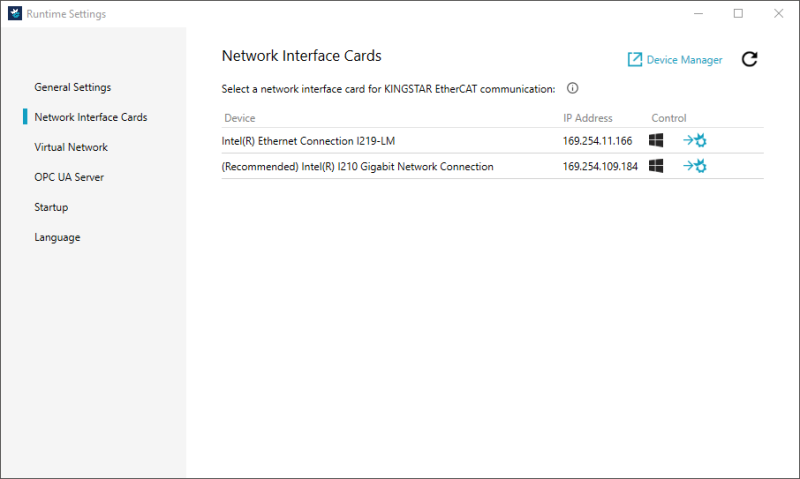
- Device Manager (upper-right): launches Device Manager. You need to use it when you manually assign your network card.
- Refresh
 : gets the latest state of your network cards. If you didn't leave the Network Interface Cards page and change something with your network card outside Runtime Settings, Refresh is required.
NOTE: A card's name might be changed after you assign it to KINGSTAR or return it to Windows. Click Refresh to get the updated card's name.
- Device: the network cards available to KINGSTAR. The text (Recommended) means the card is in the KINGSTAR supported Network interface cards list. We recommend you use it. If your card is not in the list, you can still use it, but it may not be as stable as the cards supported by KINGSTAR.
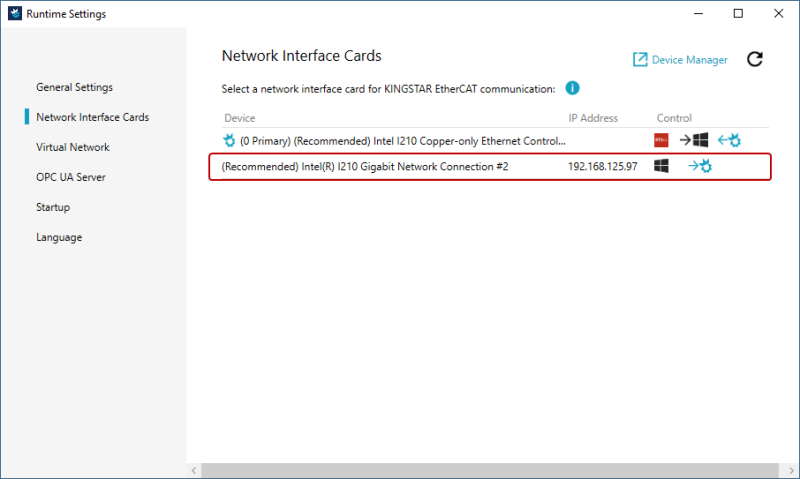
- IP Address: the IP address of the network card.
- Control: assigns a network card to a platform.
- Windows to KINGSTAR (
 ): the card is controlled by Windows now. When you click
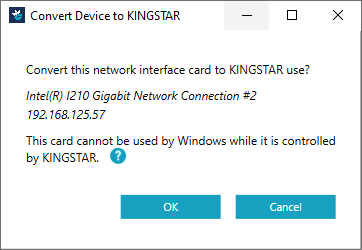
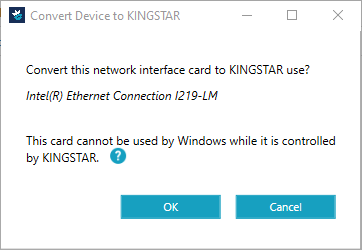
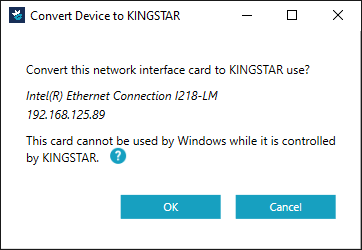
  , the system will ask whether you want to convert this card to KINGSTAR. If you click OK, it will be assigned to KINGSTAR. Once you give it to KINGSTAR, Windows cannot use it. You need to make sure the card you assign to KINGSTAR is not the one used to connect to the internet.
 - KINGSTAR to RTX64 or to Windows (
 ): when this sequence appears, you can see the KINGSTAR icon
  is in front of the card, which means KINGSTAR is controlling this card now. You have two choices:
 -
 : releases this card from KINGSTAR.
 -
 : assigns this card to Windows.
 - RTX64 to KINGSTAR or to Windows (
 ): the card is controlled by RTX64 now. You have two choices:
 -
: assigns this card to KINGSTAR.
-
: assigns this card to Windows.
NOTE: After clicking OK, the Configure Network Interface Card window appears. The KINGSTAR instance only appears if you have created instances on the General Settings page. You can select an instance for this network interface card. Select Primary network interface card if you don't need to configure the Cable Redundancy function. To configure the network interface cards for Cable Redundancy, please refer to With Cable Redundancy Package.

Manually assign an NIC to KINGSTAR
These steps are required only if you didn't assign a card when you install KINGSTAR Runtime.
Two different cards
If you have two different network cards, take the following steps to assign one network card to KINGSTAR.
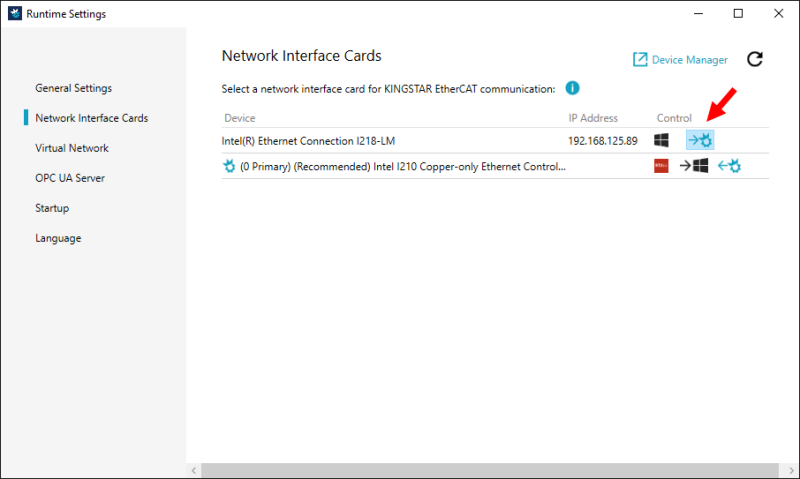
- Select a network card and click its icon.
- The Control Panel asks if you want to assign this card to KINGSTAR. Click OK.
NOTE: After clicking OK, the Configure Network Interface Card window appears. The KINGSTAR instance only appears if you have created instances on the General Settings page. You can select an instance for this network interface card. Select Primary network interface card if you don't need to configure the Cable Redundancy function. To configure the network interface cards for Cable Redundancy, please refer to With Cable Redundancy Package.
- The card has been assigned to KINGSTAR.

Two identical cards
When you have two identical network cards, they both will be assigned to KINGSTAR or Windows when you click the assign button. This happens due to the limitation of Windows. The only way to avoid this problem is manually assigning one card.
NOTE: If you choose to assign two identical cards automatically to KINGSTAR, one card will be assigned to KINGSTAR and the other is to RTX64. If you choose to assign them automatically to Windows, both of them will be assigned to Windows.
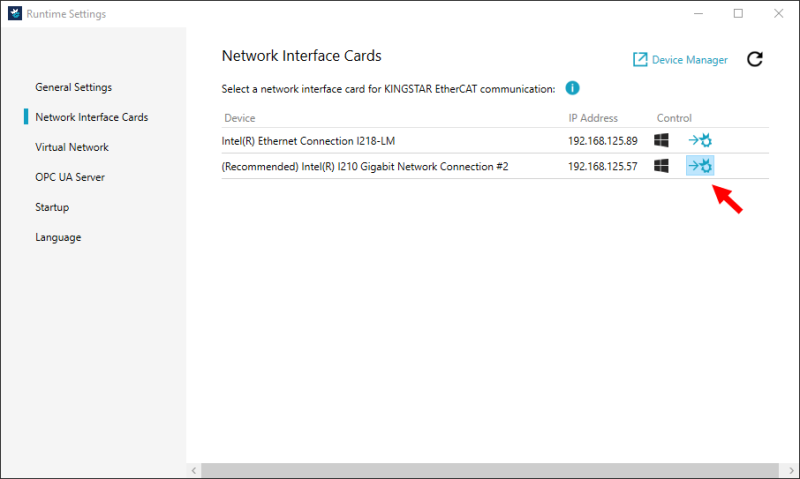
To manually assign a card:
- Select one card and click to assign it to KINGSTAR.
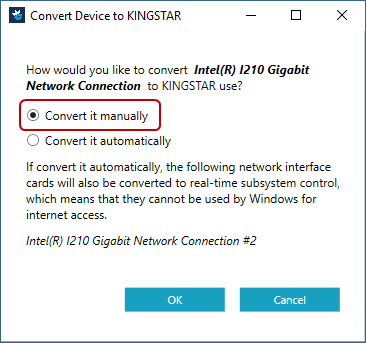
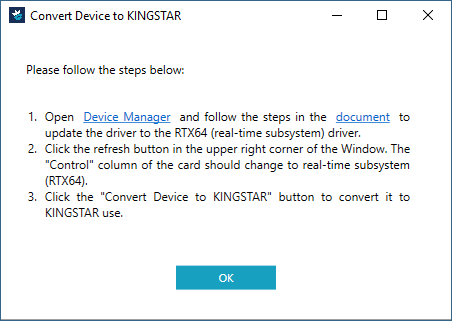
- You'll be asked how you want to assign this card. Click Convert it manually and click OK.
- Follow the steps on the page.
- The card has been assigned to KINGSTAR.
NOTE: You don't have to select the first. Select the card you want to use. The screen shot just shows an example.

Return a card to Windows
You need to assign at least one network card to Windows so you can access the internet. If you need to take the network card back from KINGSTAR, take the following steps to return the card to Windows.
Two different cards
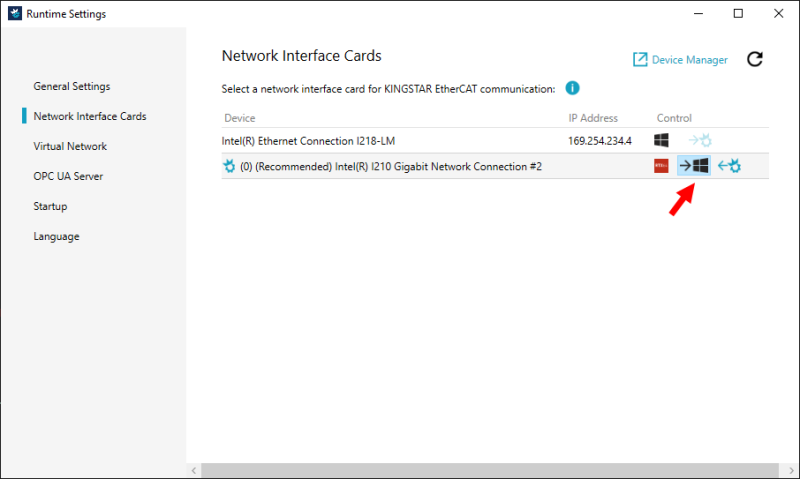
- Select the card that is occupied by KINGSTAR and click to assign it to Windows.
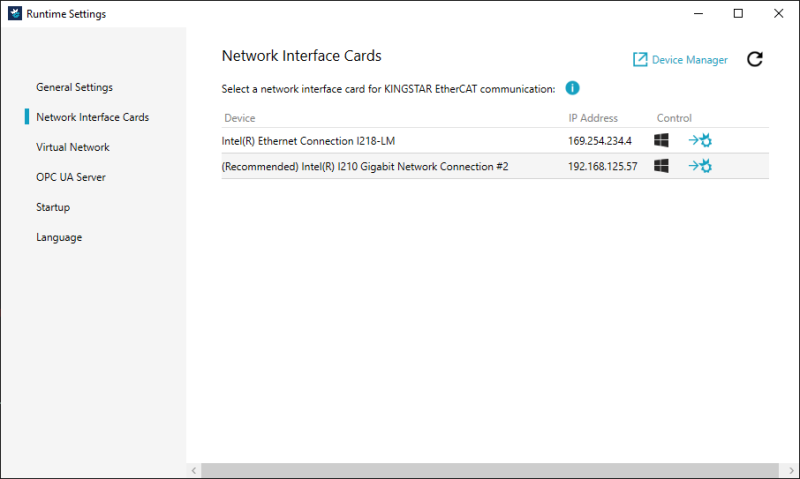
- The card has been returned to Windows.
Two identical cards
When you install KINGSTAR Runtime, there is one step that asks you to associate a network card with KINGSTAR Runtime. If you have two or more identical cards and you select one of them in this step, the selected one will be assigned to KINGSTAR and other same models will be assigned to RTX64, resulting in no card being used for Windows. To solve this problem, you need to give one card back to Windows.
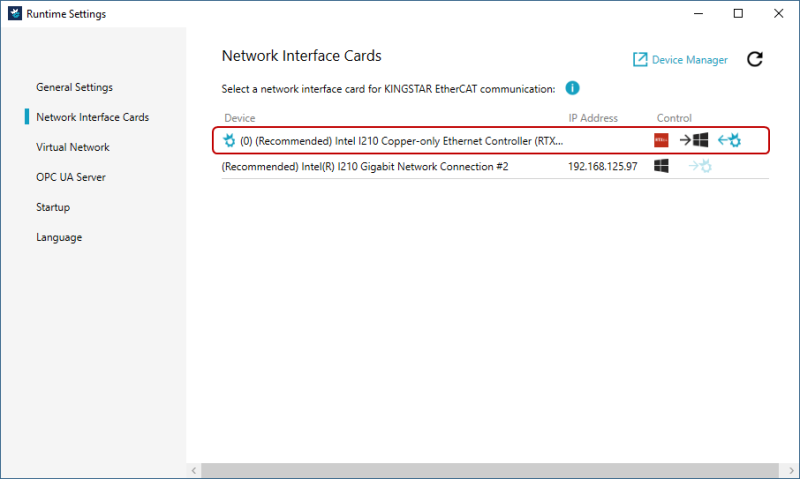
- After KINGSTAR Runtime has been installed, you'll see one card is assigned to KINGSTAR ( is in front of the card) and the other is to RTX64. Click Device Manager.
- Click Start
 > KINGSTAR 4.5 Runtime > Help System. See Manually configure system settings > Return an NIC to Windows and follow the steps to assign one card to Windows. You can also find this guide in the online help.
 - After the change is made, click Refresh . You'll be asked if you want to clean invalid settings. Click OK.
- The card has been returned to Windows.

Cable Redundancy
Cable Redundancy allows the last EtherCAT slave to connect to another network interface card on the computer so all the slaves can be communicated even if one cable is broken. This feature requires Cable Redundancy Package. For more information about how redundancy works, see Concepts > EtherCAT cable redundancy.
- Without Cable Redundancy Package
- Click to assign a card to KINGSTAR.
- The Control Panel asks if you want to assign this card to KINGSTAR. Click OK.
If you have two network cards, only one of them can be assigned to KINGSTAR. The following steps are the same as Manually assign an NIC to KINGSTAR > Two different cards. We want to show you the difference between without and with Cable Redundancy Package, so we walk you through the steps again.
- The card has been assigned to KINGSTAR – note that the KINGSTAR icon of the upper card is dimmed. You can't assign it to KINGSTAR.
- With Cable Redundancy Package
- Click to assign a card to KINGSTAR.
- The Control Panel asks if you want to assign this card to KINGSTAR. Click OK.
- The Control Panel asks which card you want to assign to KINGSTAR. Click Primary network interface card and click OK.
- The card has been assigned to KINGSTAR – note that the KINGSTAR icon of the upper card is clickable. You can assign the second one to KINGSTAR. Click the icon.
- The Control Panel asks if you want to assign the second card to KINGSTAR. Click OK.
- The Control Panel asks which card you want to assign to KINGSTAR. Click Secondary (redundant) network interface card and click OK.
- Both cards have been assigned to KINGSTAR.
If you have two network cards, both of them can be assigned to KINGSTAR.
NOTE: The KINGSTAR instance only appears if you have created instances on the General Settings page. You can select an instance for the Primary network interface card.
NOTE: The KINGSTAR instance only appears if you have created instances on the General Settings page. If you have selected an instance for the Primary network interface card on Step 3, you have to select the same instance for the Secondary network interface card here.

See also