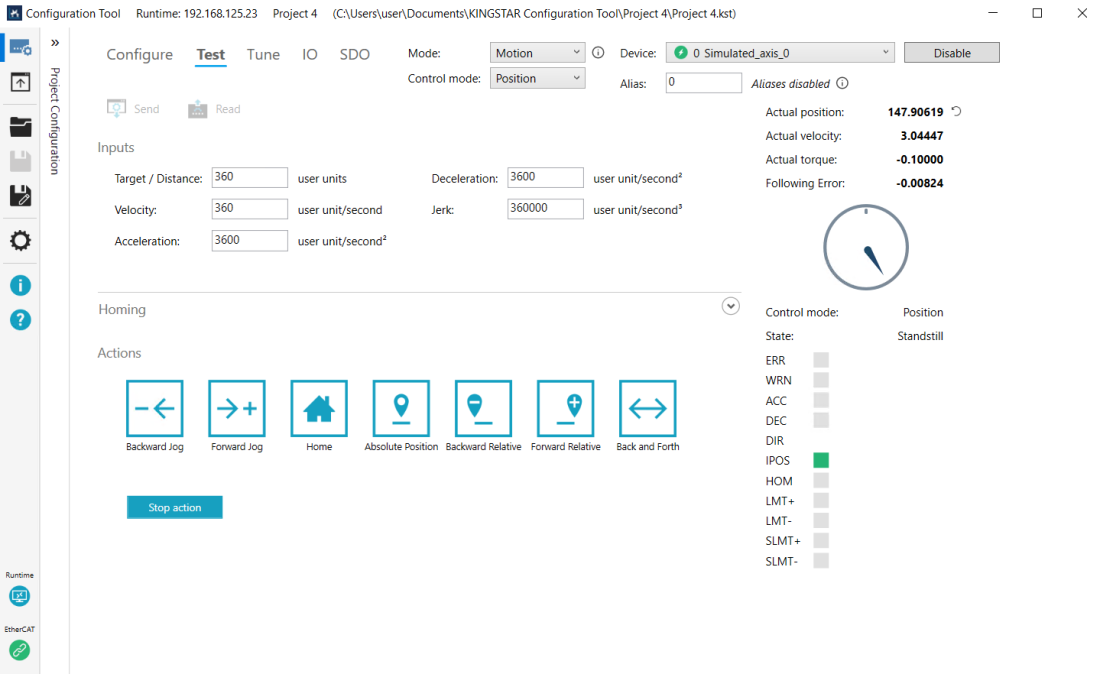
This page provides the basic motion functions for users to test the axes. You can use each motion to see whether the axis can move properly.
To enter this page, click on an axis device on the Project Configuration pane and then click the Test tab on the Settings pane. To start testing the selected axis, click the Enable button on the upper-right window. You can also select an axis from the Device drop-down list and then Enable it.
Topics:
Send and Read
The Send and Read buttons in the Configure, Test, and Tune page are linked, which means if any setting that affects the axis has been changed in these pages, Configuration Tool will detect and mark it. For more information about the buttons, see Configure > Send and Read.
In the Test page, the setting related to Send and Read is Homing.
Send: applies the new values to the KINGSTAR Subsystem. After you click Send, Configuration Tool will remind you the settings will be changed.
Read: reads the values from the KINGSTAR Subsystem. After you click Read, Configuration Tool will remind you the values read will overwrite the values in the fields.
Inputs

Target / Distance: the target position or relative distance for the motion.
Velocity: velocity.
Acceleration: acceleration.
Deceleration: deceleration.
Jerk: jerk.
All the motion parameters in Configuration Tool are affected by Unit conversion (Configure > Feedback) and Profile type (Configure > Motion). For more information about how Profile type works, see Concepts > Motion profile type.
| Unit per second | Delay in second | |
|---|---|---|
| Unit conversion (On) |
Target/Distance: user units Velocity: user units per second Acceleration: user units per second2 Deceleration: user units per second2 Jerk: user units per second3 Jolt: user units per second4 |
Target/Distance: user units Velocity: user units per second Acceleration: second Deceleration: second Jerk: second Jolt: second |
| Unit conversion (Off) |
Target/Distance: counts Velocity: counts per second Acceleration: counts per second2 Deceleration: counts per second2 Jerk: counts per second3 Jolt: counts per second4 |
Target/Distance: counts Velocity: counts per second Acceleration: second Deceleration: second Jerk: second Jolt: second |
Homing
Sets the homing mode for an axis. Click ![]() to expand the Homing options.
to expand the Homing options.
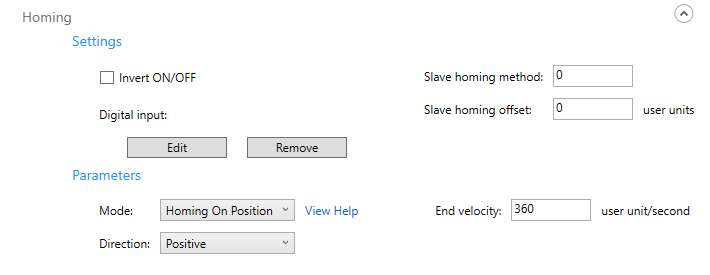
Settings
Invert ON/OFF: inverts the sensor value. When it is not selected, the sensor is considered touched as it is high (on). When selected, the sensor is considered touched as it is low (off).
Edit: selects a digital input from the module list.
Remove: removes the selected digital input.
Slave homing method: uses the servo drive's homing features. For more information about the homing methods your servo drive provides, see its user guide.
Slave homing offset: the distance the axis moves after it finds the homing sensor.
Parameters
Mode: homing mode. Modes: Homing Latch, Homing Soft, Homing Sensor, Homing Slave, Homing On Position, and Manual homing slave.
Direction: the homing direction. It's Positive or Negative.
End Velocity: the end velocity of the homing move. The usage depends on the homing mode.
Actions
The basic movements to test axes.
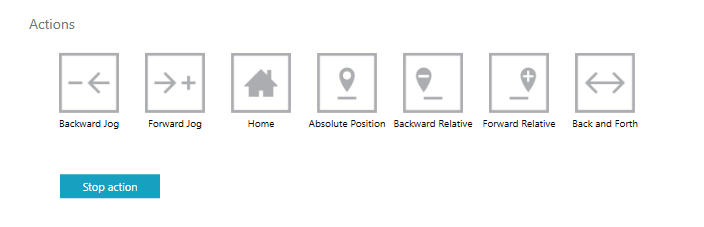
Backward Jog and Forward Jog
Jog tests velocity without specifying a target position. You can choose the backward or forward direction. This motion is corresponding to IAxis.Jog.
To make a jog movement, press and hold one of the Jog move icon. Release the mouse button when you want to stop.
Home
Commands the axis to perform the "search home" sequence. This feature is corresponding to IAxis.Home.
To use Home, click its icon.
Absolute Position
Absolute commands a controlled motion to a specified absolute position, which is corresponding to IAxis.MoveAbsolute.
To use Absolute Position, click its icon.
NOTE: When modulo axis is enabled, the Absolute position command will take the shortest path to reach the target position.
Backward and Forward Relative
Relative commands a controlled motion of a specified distance relative to the current position. These movements are corresponding to IAxis.MoveRelative.
To use Backward Relative or Forward Relative, click its icon.
Back and Forth
This motion is similar to Relative Position, corresponding to IAxis.MoveRelative. The difference is that it moves the axis back and forth. The distance is determined by Target / Distance.
To use Back and Forth, click its icon. To stop it, click Stop action.
Stop action
Stops a movement.
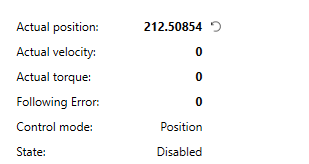
Motion states and values
The result of a move is displayed here.
Axis
|
Actual position: the actual position. When modulo axis is enabled, this value is converted to a modulo value, and a modulo dial indicator is displayed. Actual velocity: the actual velocity. Actual torque: the actual torque. Following error: the following error. Control mode: the control mode. To see the full name of the control mode, hover the mouse pointer over the mode. See McControlMode for further details. State: the state of an axis. See AxisState for further details. |
|
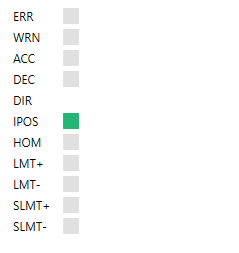
LEDs
|
Colors and signs:
ERR: the error of an axis. Error code:
WRN: axis warning. ACC: acceleration. DEC: deceleration. DIR: direction. The icon won't be displayed if the axis is in these states: Offline, CommunicationError, MotionError, Disabled, StandStill.
IPOS: in position. HOM: home switch. LMT+: positive limit switch. LMT-: negative limit switch. SLMT+: positive software limit switch. SMLT-: negative software limit switch. |
|
 : positive.
 : negative.
See also